Edit Activity Areas
You can modify an activity area’s geometry after it has been created. Editing is useful when operational changes require adjusting boundaries or when the original design needs refinement. For example, you might need to extend an area to cover a missed bench, align neighbouring areas to avoid leaving unmined walls, change the activity area depth (mining level), and so on.
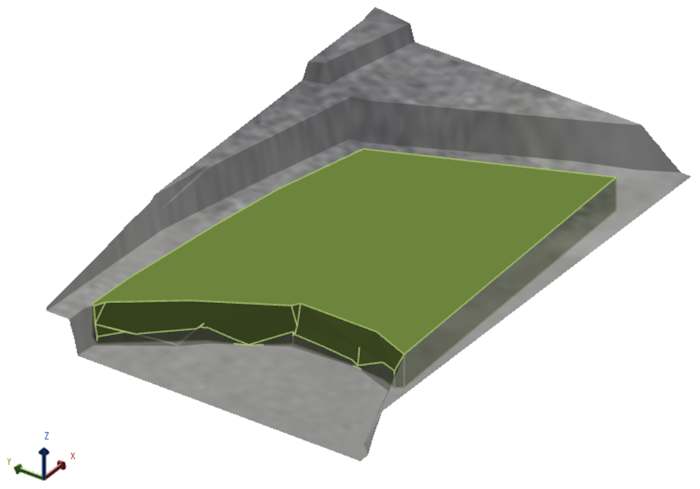

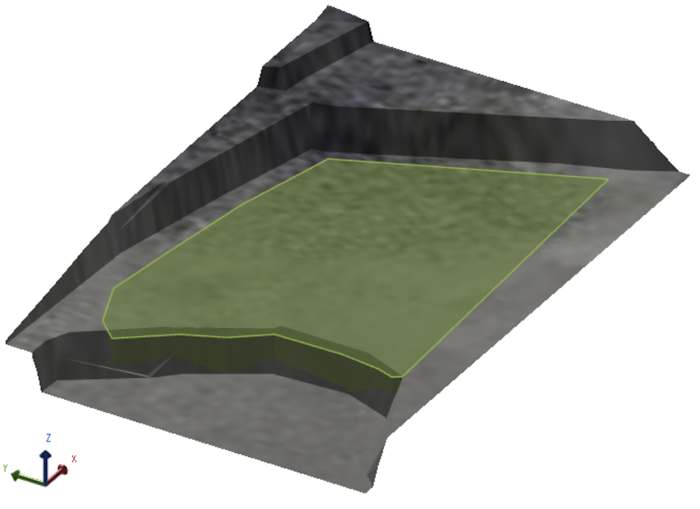
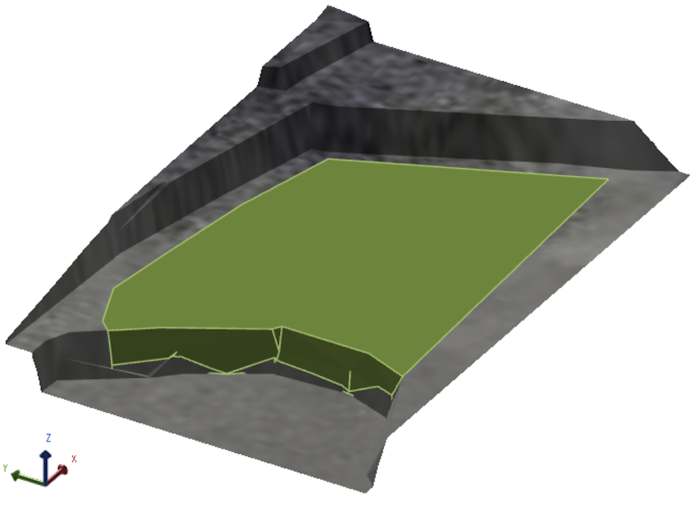
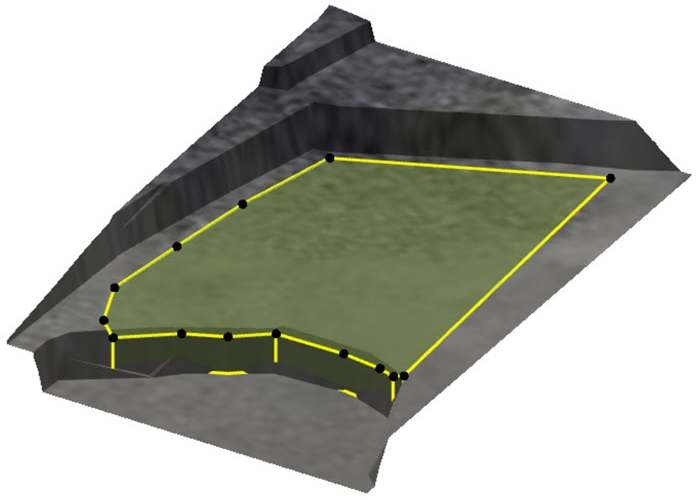
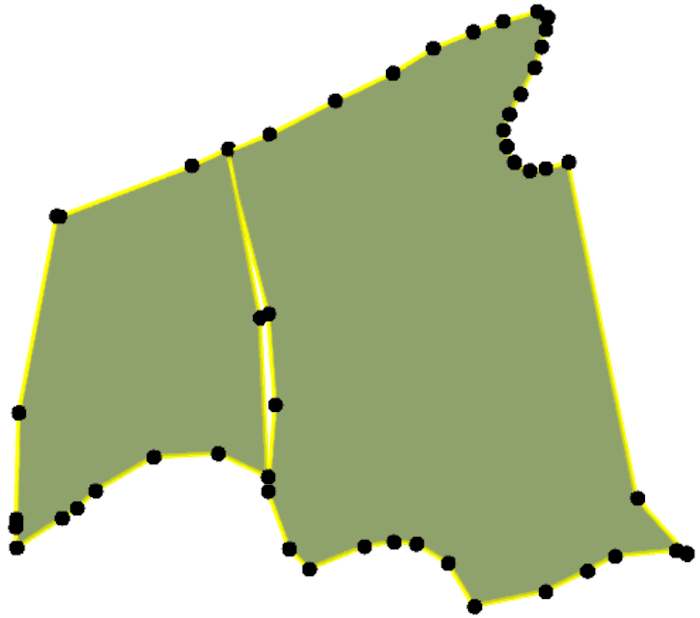
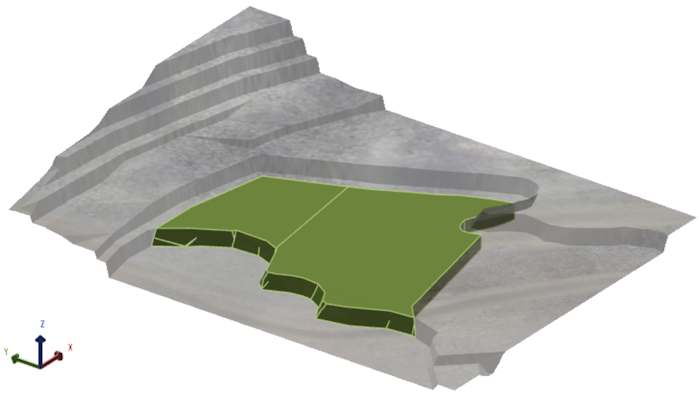
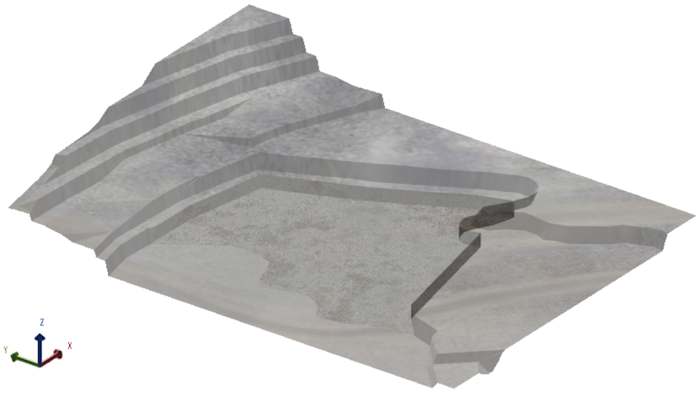
Before and after editing an activity area. The original roof didn’t fully cover part of the topography (a bench ledge). The shape was extended to correct the coverage.
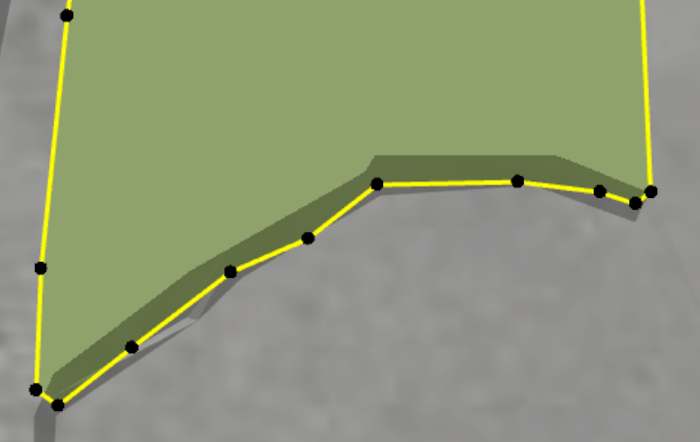
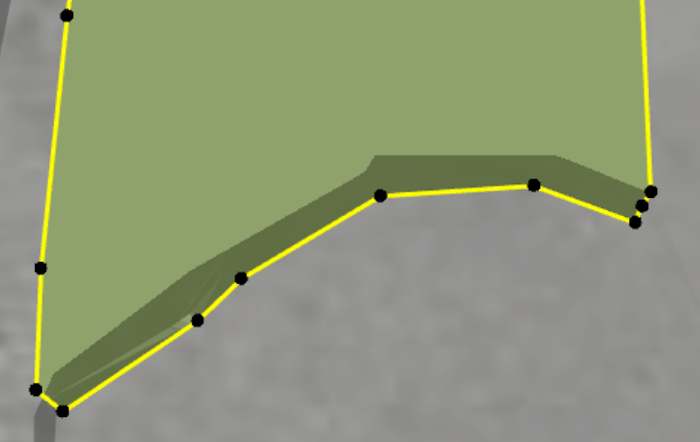
Another view of before and after editing the points
Before you start
Before editing an activity area, make sure the environment is set up for accurate and efficient changes:
-
In Client, go to the Activity Areas tab.
-
Set the Display Style to Polygon so you can see and edit the original design outline.
-
Ensure the activity area is unlocked.
Edit the shape
You can edit an activity area’s shape by adding, moving, and deleting points.
1. Switch to Polygon view
On the Activity Areas tab, set Display Style to Polygon (or press Ctrl+E). This shows the editable polygon outline.
Switching to Polygon display mode
2. Select the activity area
Click the activity area in the 3D scene. Its points appear as black dots along the roof.
3. Prepare the plot view
Switch to plan view for the most accurate drawing. Your cursor will snap to the Z point on the topography at the selected XY location.
-
Click Down
 to enter plan view.
 -
Set the camera to Orthographic (Graphics Settings
 > 3D Settings > Camera Projection).
Use the Scene Manager to
-
Show only relevant objects, such as topography, feature layers, bucket positions (for example, enable feature layers or grade control shapes as visual guides for drawing accurate boundaries).
-
Hide other activity areas that might obscure your view.
Adjust the transparency for objects like the topography to better see depth and underlying features (in Client, go to the object’s respective tab to adjust its opacity).
Changing differing view items and transparencies
3. Edit points
You can drag, add, and remove points.
-
Move a point: Click and drag it. When it turns orange, it’s active for editing.
-
Add a new point: Hover over a segment midpoint until an orange dot appears, then drag it to the desired location – and double-click to confirm.
-
Remove a point: Double-click the vertex.
After adjusting the points, click away from the polygon to confirm your changes.
If needed, use the design assistance tools for precise line segment and point placements (refer to Design assistance tools).
Editing an activity area
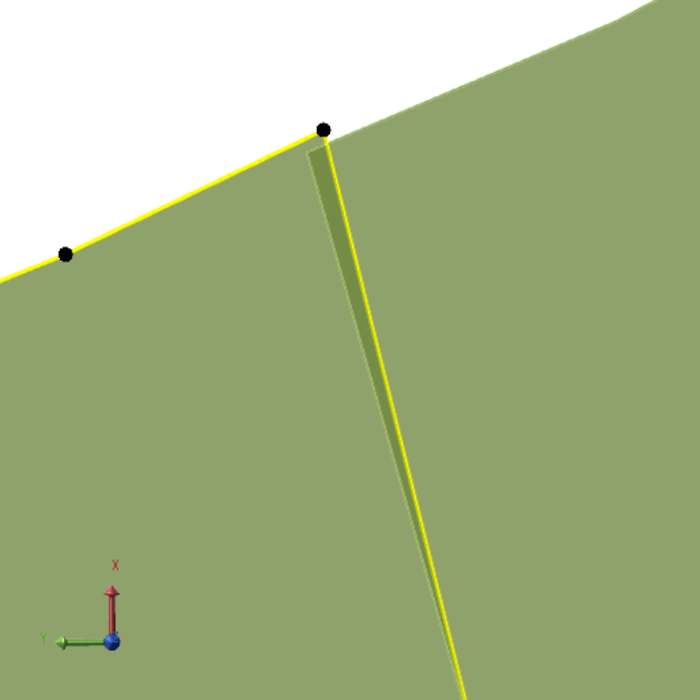
Shared points
When two activity areas share a vertex (same XY coordinates), the point appears white instead of black. Moving a shared point updates both areas at once. This is useful for:
-
Keeping adjacent areas aligned.
-
Avoiding thin unmined walls between areas in the schedule animation.
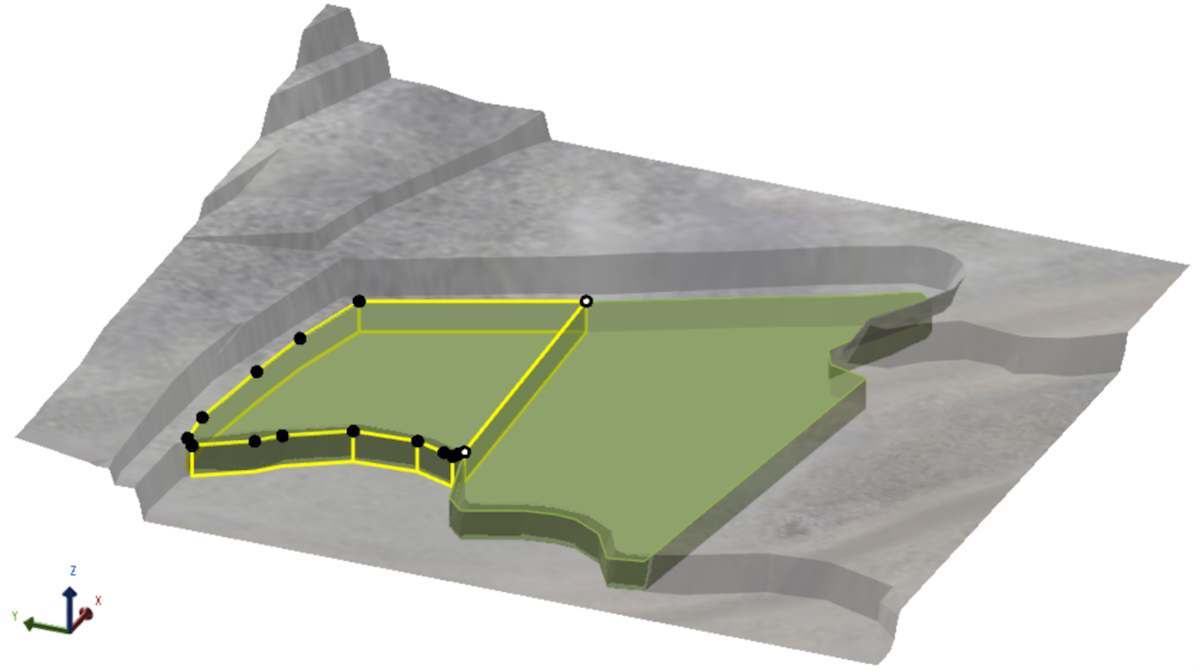
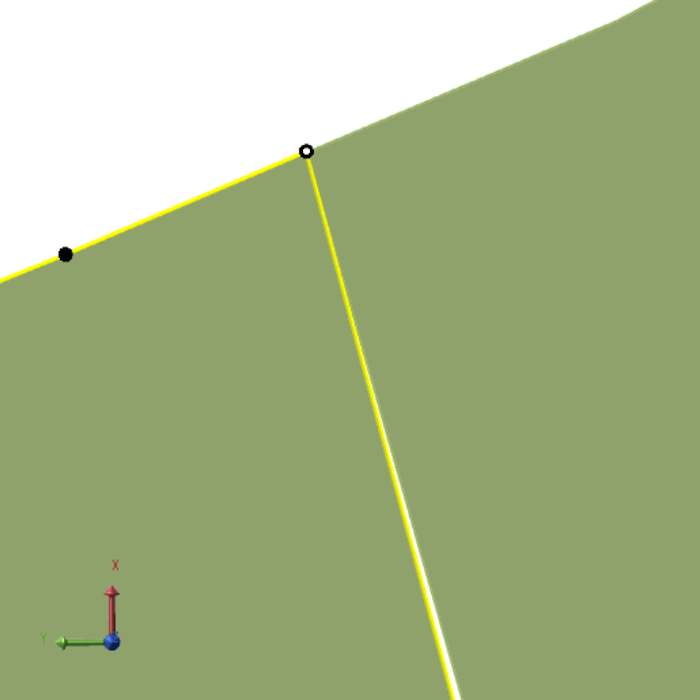
Two neighbouring activity area. Two points (white) overlap.

Moving shared points
Necessity of shared points
If neighbouring areas don’t share points, even small misalignments can leave narrow gaps. These gaps appear as thin walls in the schedule animation after both areas are mined. They can also cause reporting inaccuracies.
At first glance, two adjacent activity areas may look aligned. But when you zoom in, you might see that their walls don’t exactly match because the points were placed imprecisely, often due to plotting at a high-level zoom or using perspective view instead of plan view.
In the schedule animation, this misalignment creates an unmined wall between the areas.

There is an unmined wall between the activity areas
To fix this, the points must be adjusted so that they share the same XY coordinates.
How to create shared points
-
Zoom in for precision
Use plan view and zoom in as close as possible to ensure exact XY alignment.
-
Drag the vertex
Move a vertex so it exactly matches the XY position of the other area’s vertex.
-
Confirm alignment
When the points align, they turn white, indicating they are now shared.
-
Repeat as needed
Align all relevant points to maintain a clean boundary between areas.

Now, when the activity areas are mined, there’s no unmined wall between them.
Before and after mining the activity areas
Best practice
-
Always check alignment for adjacent areas after editing.
-
Use shared points when designing ramps or pushbacks to ensure smooth transitions.
-
If you need to move only one area’s vertex later, hold Ctrl while dragging to break the shared link.
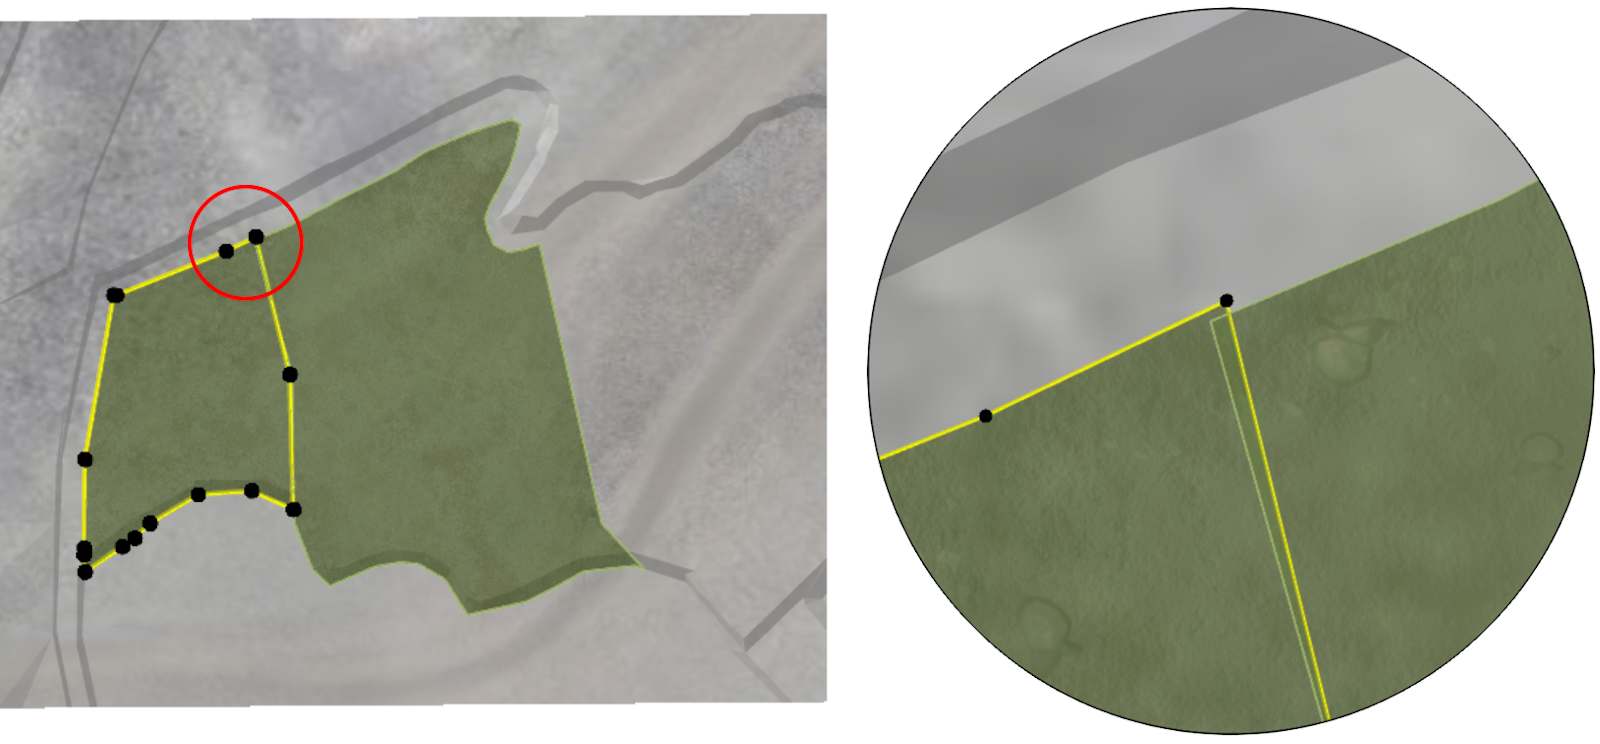
Zoom for precision
When editing points, always zoom in as close as possible and use plan view for accuracy. This is especially important when the topography dictates where a point should go. For example, by zooming in, you can clearly see where a bench ledge ends and place the point exactly on the edge—rather than slightly before or after it. This ensures the activity area accurately reflects the real-world surface and avoids leaving small gaps or overlaps that could affect scheduling and reporting.

Zooming in to move points so that they precisely align with the bench ledge
4. Validate changes
After editing the shape, confirm that the activity area is correct and ready for scheduling:
-
Switch display style: Change from Polygon to Solid or Slice view on the Activity Areas tab. These views show the true 3D shape, including trimming by topography and pit limits.
-
Look for gaps: If adjacent areas should join seamlessly, verify there are no thin walls or gaps. Use Wireframe mode for better visibility.
-
Review dependencies: If overlaps changed, check that dependency rules still make sense.
-
Adjust mining direction: If the shape changed significantly, update the mining direction to reflect the new geometry.